
 Image 1 of 3
 Image 2 of 3
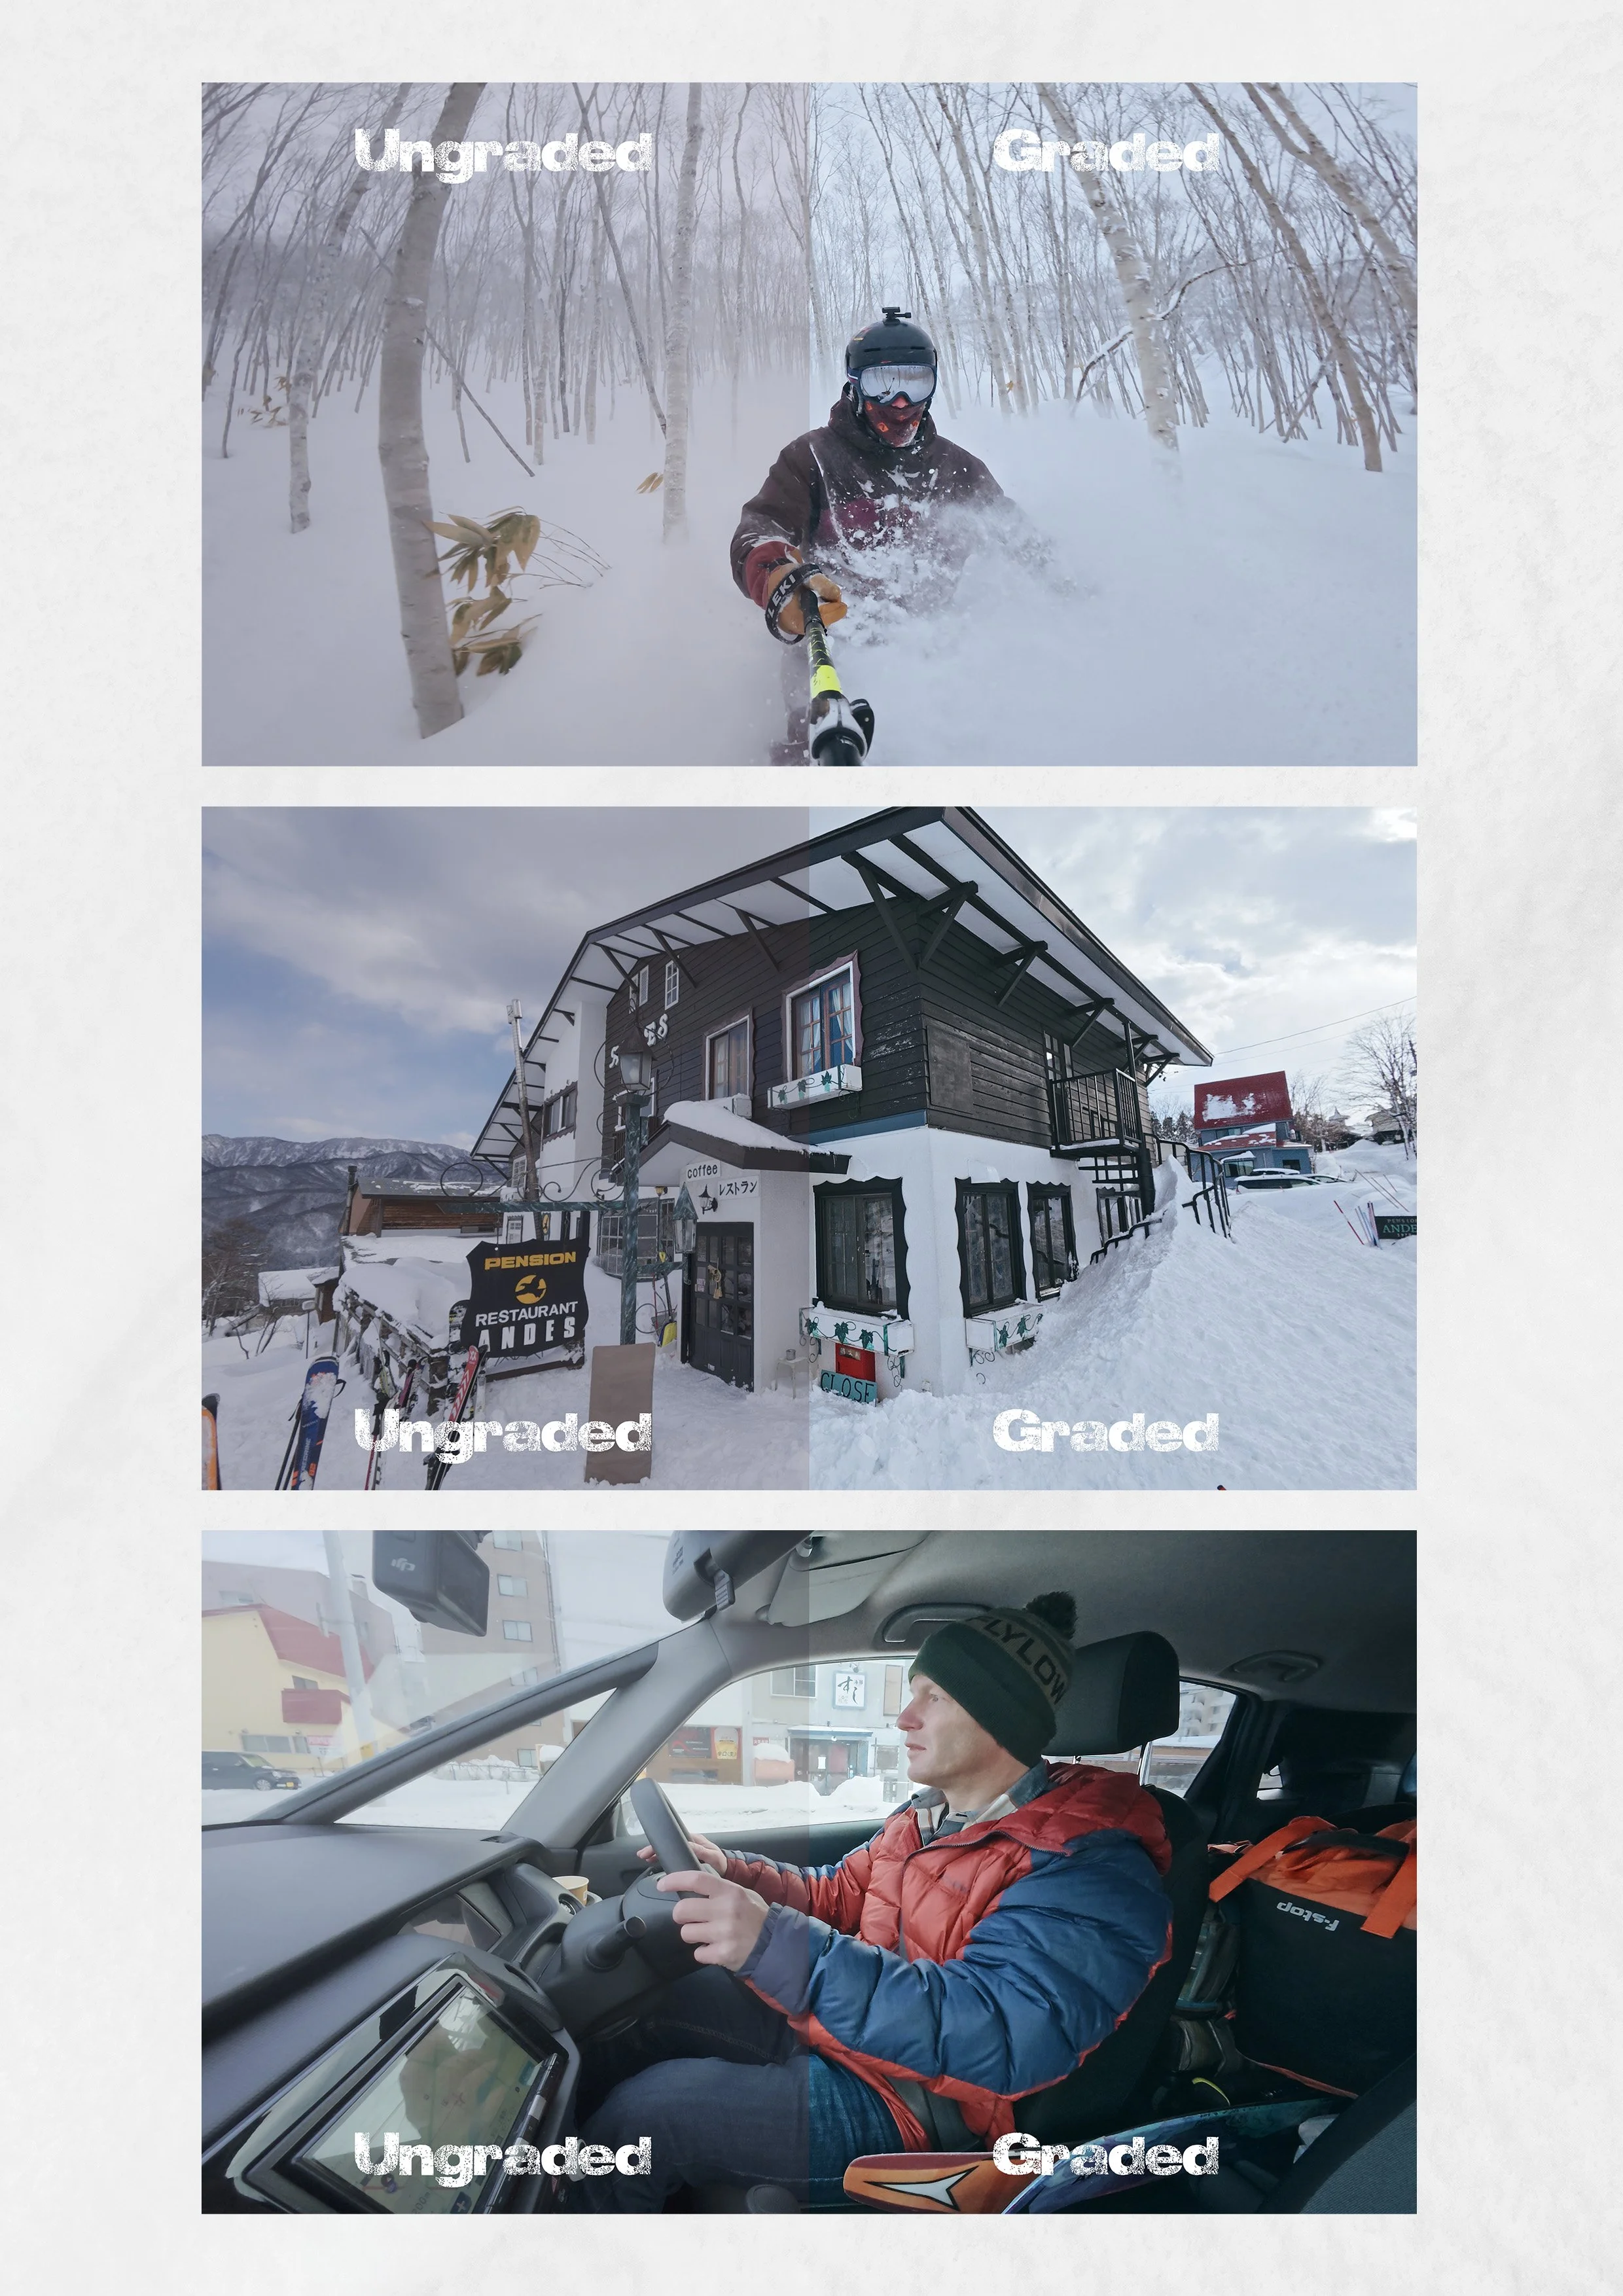 Image 3 of 3
TUTORIAL
https://youtu.be/qErNvpKUGNk
DOWNLOAD
You’ll receive a .drx file which can be imported into the color page of DaVinci Resolve (Free or Studio version). If you’re using the free version of DaVinci, the ‘Glow’, ‘Grain’ and ‘Noise Reduction’ effects will be disabled, but these three effects aren’t essential to the grade and can be omitted.
📄 README
Installation Guide for The Slippery Slope Osmo Action 4/5/6 Grade
1. Install DaVinci Resolve
If you don’t already have DaVinci Resolve:
Download DaVinci Resolve (Free or Studio):
https://www.blackmagicdesign.com/products/davinciresolve
Install it on your computer following the on-screen instructions.
2. Download the Official DJI D-Log M → Rec.709 LUT
This grade requires the official DJI conversion LUT.
Go to the DJI LUT download page (Download Center - Software - Transcoders):
https://www.dji.com/downloads/softwares/dji-osmo-action-6-d-log-m-to-rec-709-lutDownload the .cube file or the LUT pack.
If it’s a LUT pack, unzip it. You will find one or more .cube LUT files inside.
Note 1: The current LUT file may be named something like:
DJI OSMO Action 6 D-LogM to Rec.709 LUT-11.17.cube
Note 2: Even if you are shooting with an Osmo Action 4 or 5,
I recommend using the Action 6 D-Log M → Rec.709 LUT.
I’ll explain this in more detail in the tutorial video, but this note is here so you choose the correct LUT right away.
3. Install the DJI LUT in DaVinci Resolve
Open DaVinci Resolve and any project (can be empty).
Click the gear icon (project settings) in the bottom right corner.
Select Color Management.
Scroll to Lookup Tables.
Click Open LUT Folder.
Copy the downloaded .cube file(s) into this folder (or better make a subfolder called DJI, which stores all your DJI LUTS).
Back in Resolve, click Update Lists.
Note 1: To verify the LUT Installation
Open the Color page.
Right-click a node → LUT.
Locate the DJI D-Log M → Rec.709 LUT in the list.
If it appears, everything is ready for the next step.
4. Install the Super Duper Ultimate Slippery Slope Color Grade
Your download includes a .drx file (DaVinci Resolve PowerGrade) and a preview image.
How to Import the DRX File by Drag & Drop
Open DaVinci Resolve.
Go to the Color page.
Open the Gallery panel (top-left).
Select the PowerGrade or STILLS album (or create your own album).
Drag the .drx file directly into the Gallery.
This is the easiest and fastest method. Alternatively you can right-click and import the .drx
5. How to Apply the Color Grade to Your Footage
Once the DRX file is imported:
Select a clip in your timeline.
In the Gallery, locate the imported grade.
Middle-click the still to apply the entire node tree.
Alternatively, you can: Right-click the still → Apply Grade.
Both methods apply the full color grade to your selected clip.
📌 Important Notes
✔️The grade was created for DJI D-Log M footage WITH THESE SETTINGS
To get the right look use these settings in your Action 4/5/6:
Open image settings (two lines icon on the right hand side of your rear screen)
Select PRO which will bring up more options
Exposure AUTO (manual works too but can be tricky in changing lighting conditions)
WB 5500K (I don’t use AWB to avoid color shifts)
Color D-Log M 10bit (I leave Color Recovery OFF)
Image Adustments: Texture -2 (I leave noise reductions at 0)
NOTE: I use 4K50/RealSteady/Ultrawide for skiing but you can choose whatever you like.
✔️The grade includes Studio-only effects
This grade uses:
Noise Reduction
Glow
Grain
If you’re using the free version of Resolve:
The grade will still load
But those nodes will show a watermark when turned on (you can delete these nodes if you like and save your grade as a new still.
Or will be disabled until you upgrade to Studio